First you need to activate the languages available for the tour.
Select Virtual Tours -> Editor UI from the side menu.
Click on top right language icon.
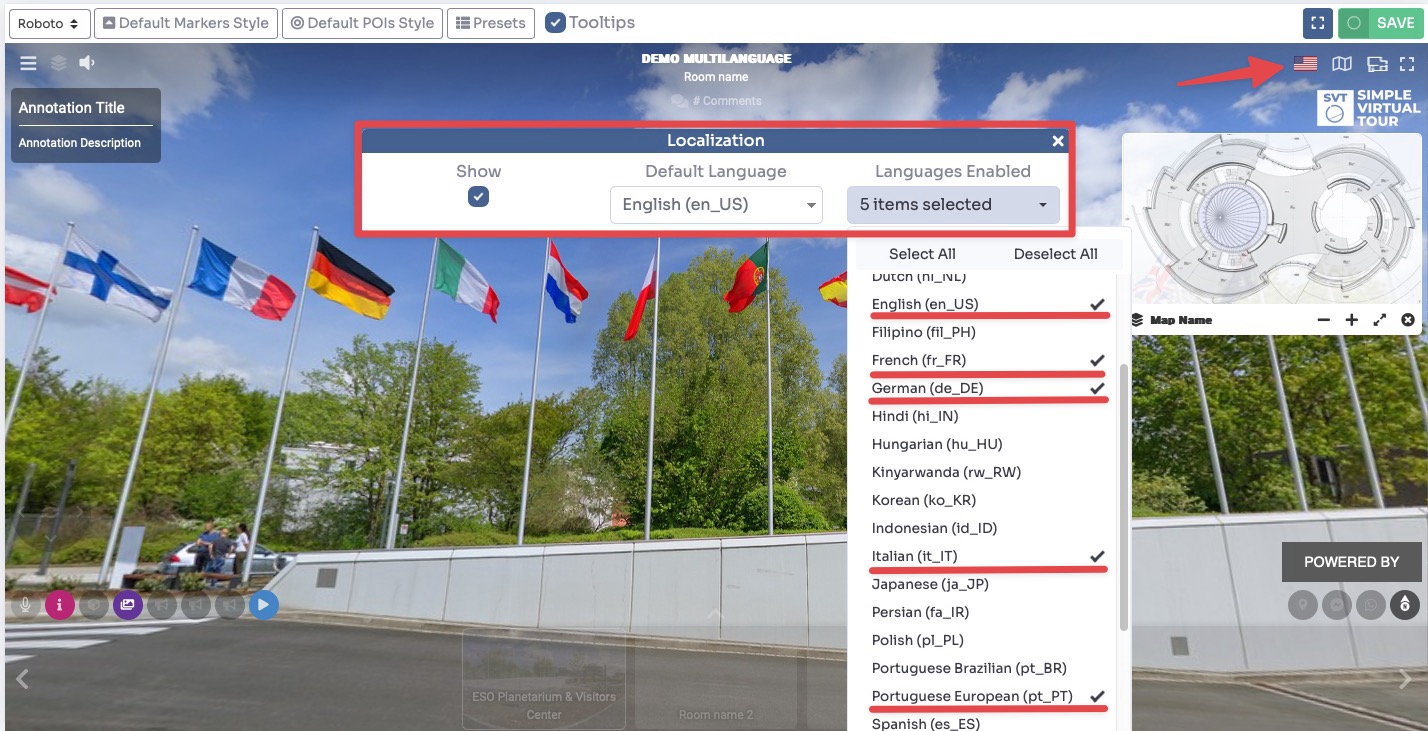
Here you can decide whether or not to display the language selector, set the default language and all those enabled for the tour.
Click Save on top right corner of the page.
Once you have set the languages, within the various editing sections of the tour and content, you will find flags near the fields that can be translated.
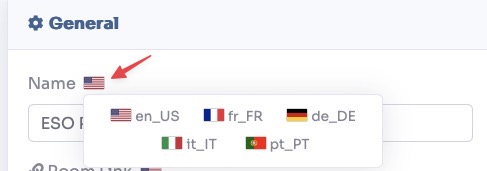
Just change the language and write the content in the desired language.

In the publish section of the tour you will now also have different links for each language.

Now within the tour you can change the language by clicking the icon at the top right.
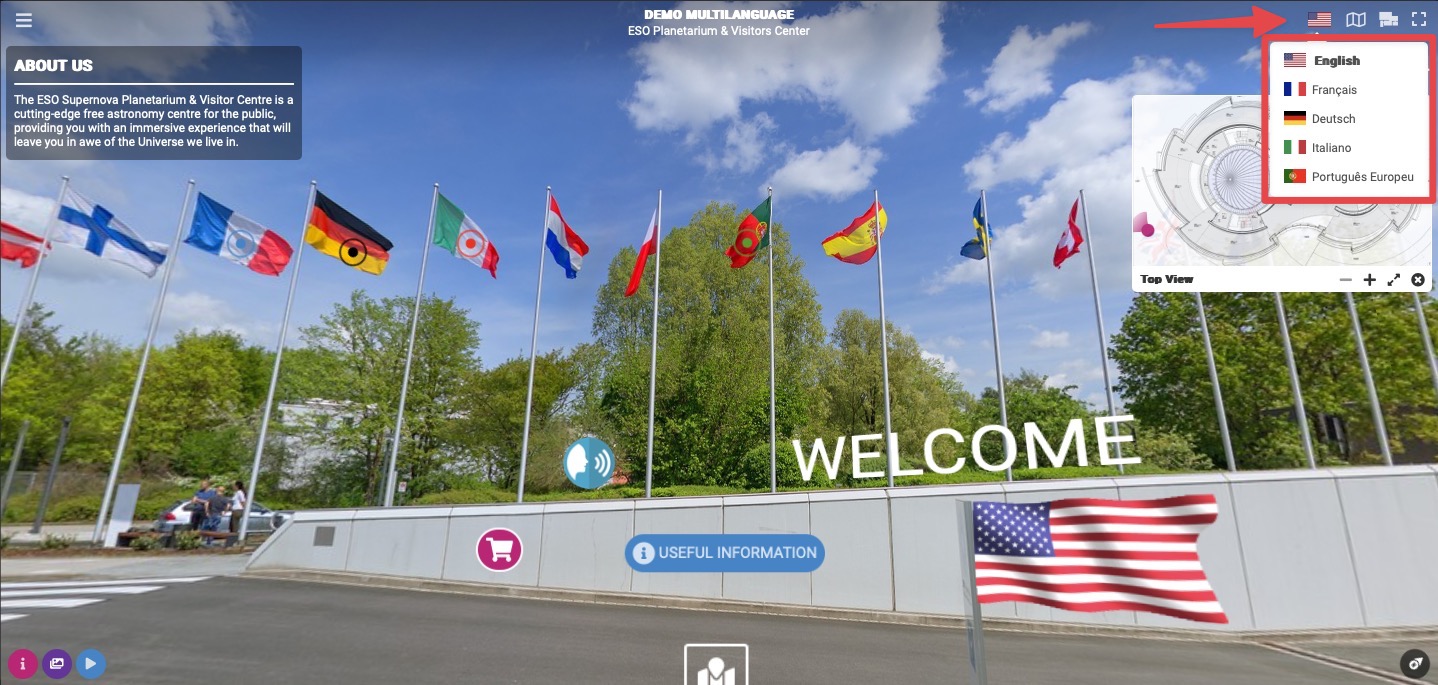
You can view a live preview of multi language in this demo