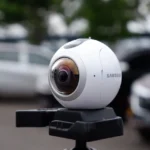
Ever wondered how to capture a full 360-degree view of a beautiful location right from your smartphone? Well, 360-degree photos let one capture the whole scene around him and virtually put him in that very place. If you want to try out this sort of immersive photography, then look no further than your smartphone. Let’s dive into how to take 360-degree photos and get the most out of your mobile device!
What You Need to Get Started
The good news is that most modern smartphones have the inbuilt features needed to take 360-degree photos. The trick is in using the right app because many smartphones’ built-in camera apps often lack a particular mode for 360-degree photo shooting. Here’s what you need:
A smartphone with a good camera-most recent models can pull it off.
A 360-degree photo app such as Google Street View, Panorama 360, or Insta360
Smoother shots with the help of a steady hand or a smartphone tripod
Step-by-Step Guide to Taking 360-Degree Photos
1. Choose a 360-Degree Photo App
If your phone doesn’t already come with some sort of 360-degree photo software, then download one. A good one that works for both iOS and Android is Google Street View. Other very well-recommended apps with regards to friendly UI and added features are Panorama 360 and Insta360.
2. Open the Application and Select the Mode 360-Degree Photo
Open the app and, once in it, search for the 360-degree photo mode. Using the example of Google Street View, you will find that it has an option to take a “photo sphere.” It’ll guide you through a series of shots it will stitch into the 360-degree view.
3. Find a Good Location with Minimal Movement
To get a clear-cut and panoramic 360-degree photo, you need to find a spot with little movement; for example, a park or a viewpoint of an area. It pays to be standing in a spot where you have interesting visuals in every direction since you will photograph it all.
4. Hold Your Phone Steady and Follow the App’s Instructions
On each of the photo locations, the application is going to prompt you to take several shots in multiple directions to capture the whole scenery. You will normally start by pointing your camera straight ahead of you, continuing by slowly moving the phone around you such that you take images in every direction. Remember to keep your phone firm, rotating your body instead of moving the phone. That way, you ensure that when the application stitches the photos together, there will not be much discrepancy.
5. Shoot in All Directions: Up, Down, and Around
A full 360-degree photo would include not only the scenery around you but also above and below. Some apps will prompt you to shoot extra frames to fill in the top and bottom parts of the sphere. Here, it is worth taking your time; a missing angle may result in either an incomplete or a deformed photo.
6. Review and Edit Your Photo
It will automatically stitch all the required photos after taking them and make a seamless 360-degree photo. When it is processed, take some time to go over the photo. Use its editing tools to adjust brightness, remove any visible visual artifacts, or enhance the colors for vibrancy.
7. Share Your 360-Degree Photo
Now that you have made a 360° photo, it is time to share it! Most apps let you post directly to social media or even upload to platforms like Facebook, which supports interactive 360-degree images. You can also share the photo on Google Maps if you used Google Street View to get your shot for one and all to virtually tour your shot.
Best Tips for Capturing a 360-Degree Photos
Smoothening will be helped by the camera stabilization with the help of a smartphone tripod, as all smartphone tripods contain space for placing cameras. In this case, taking shots from less crowded areas is better because the movement from people or moving vehicles can cause blurry spots across your 360-degree image.
Good Lighting Counts: The same goes with regular photography; good light brings it all together. Whenever possible, shoot 360 photos during the golden hour so the light comes softer and even.
Practice Makes Perfect: If you don’t get it right just perfect on your first tries, don’t get discouraged. The more you practice, the smoother, more immersive images you will capture.
Why Use 360-Degree Photos?
The cool thing about 360-degree photos is that they add a new dimension to your travel memories. You will be able to revisit places in a more immersive way, giving you a sense of being back there. Moreover, it is a great tool in sharing experiences with others, putting them in your shoes.


